Posted on

Picture Hanging Systems for Curved Walls

picture hanging system on curved walls

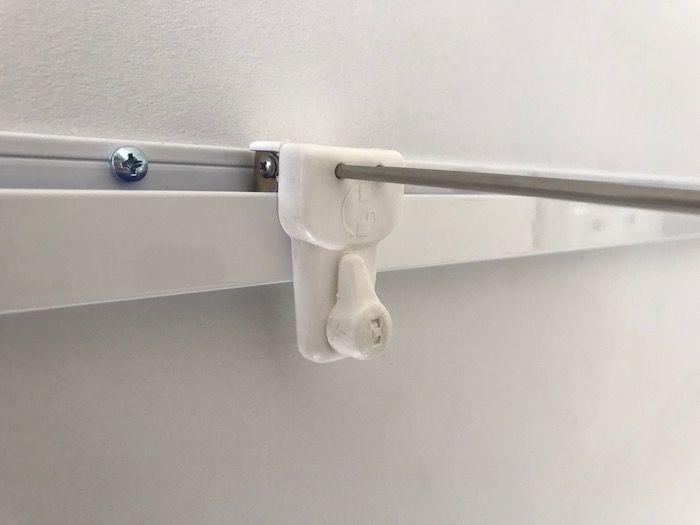
Both ‘The Gallery System’ and ‘Slimline Art Hanging System’ have some ability to absorb fluctuations that regularly occur in walls due to age or bricks that weren’t originally expected to be seen.  Sometimes a compromise has to be made but usually a solution can be found.  It is also true to say that both systems can conform to minor curves in walls although we highly recommend using extra wall anchors and fixings when installing in this fashion and certainly the ‘Slimline Art Hanging System’ is more forgiving in this application.  

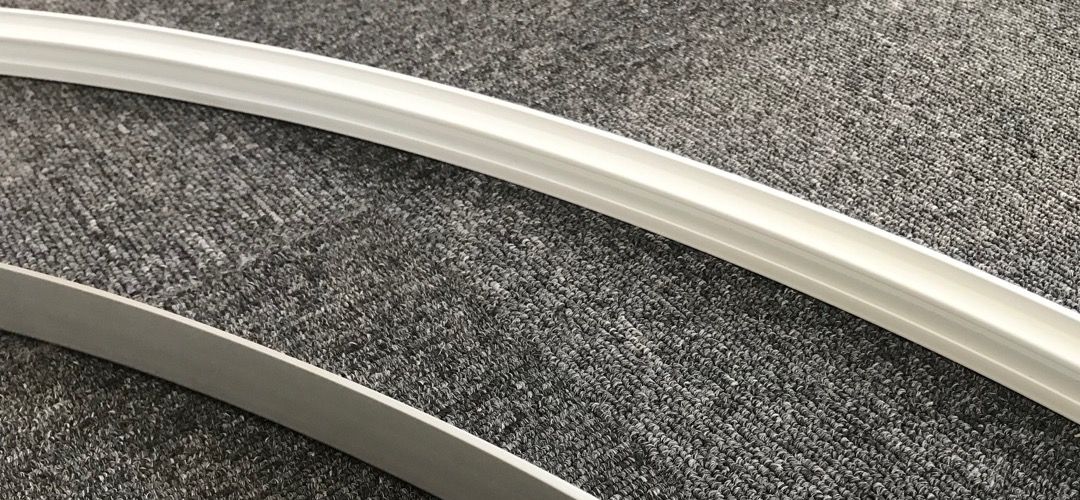
If however, you have some architecturally or otherwise design curved walls on which you are wanting to place a picture hanging system, then we have the solution for you!  The process is called ‘cold rolling’ and we have been working on developing a process to ensure we can provide neat curves to your specifications without damaging the surface of the track which would traditionally require refinishing at great expense.

For simply curves, please contact us with the radius of the required curves and the circumference lengths for a quotation.  We love a challenge though, should you have a more complex requirement please provide a drawing with the relevant specifications.

That’s all for this week! Do let me know if you have any picture hanging system questions! 

Cheers,

Ed Banks – Owner

Posted on

Troubleshooting The Gallery Lighting System

Gallery Lighting System Lighting wand prongs - hero image

The Gallery Lighting System’ is an excellent addition to ‘The Gallery System’, it provides a dynamic and cost effective solution to lighting your artwork 

Over the years however we have had one reoccurring issue that sometimes causes the system not to work correctly or at all!  

If we look at the ‘Lighting Wand’ we can see that it has two prongs designed to bite into the low voltage ‘blue cable’ and provide current to the globe.  It is very important that these prongs make a good connection to provide the appropriate current to the globe.  Interestingly, in days gone by when we used incandescent globes, the globes would light up even if a proper connection was not made.  However, modern LED globes are far more digital and if they don’t receive a minimum current will not light up at all.  

Gallery Lighting System Track with Blue cableGallery Lighting System Lighting Wand Prongs

So, how do we ensure the Lighting Wand prongs are making appropriate contact with the blue cable?  

This is simply a case of installing the wands using the following method:

1. Turn the ‘key’ on the lighting wand to open the lock and allow the wand to mate with the track.

Gallery Lighting System Lighting Wand Prongs

2. Place the wand on the track with the flat edge of the lighting wand firmly (and flatly) against the track.

Gallery Lighting System PMating Wand to track

3. Using your hands, squeeze the lighting wand down onto the track and in turn seating the prongs into the blue cable.

Gallery Lighting System Squeezing Wand Onto Track

4. Now lock the lighting wand in place with the key.

Gallery Lighting System Locking Wand into place

The secret here is to ensure that the lighting wand is squeezed into place with one’s hands before locking it in place with the key.  Using the key to lock the wand in place without squeezing it down will lead to a poor connection at best and most likely no connect at all; subsequently the system not functioning correctly. 

Gallery Lighting System lighting wand correctly installed

Once you have done this once or twice it becomes second nature and is a quick and easy way of ensuring ‘The Gallery Lighting System’ is properly setup and will function correctly.

That’s all for this week, if you have any picture hanging system questions, please do let me know.  As always, I’d be delighted to help.

Cheers,

Ed Banks

Shakespeare Solutions.

Posted on

Ikea Picture Hanging System

image of Ikea building

Are you looking for a Picture Hanging System from IKEA?

Over the years we have had a number of customers that have been looking for a Picture Hanging System they viewed at IKEA but actually IKEA has never sold a system in Australia! 

Don’t despair, we can help you hang your PJÄTTERYD pictures and Ribba frames with our brilliant range of picture hanging systems and hanging products.  Sure… they were designed by a bloke named Bruce and not a lad called Lars but we are confident you will find our Aussie designed (and it some cases made) products up to the task of displaying your decor!

As you have managed to find this secret post, apply the following code (or mention it to team member on the phone) to receive a 10% discount on your order. (valid until 30/09/2019)

‘brucenotlars’

The best place to start your search is on our Shakespeare Solutions homepage which introduces the picture hanging systems, however if you are after a system for home, you will most likely want to consider the ‘Slimline Art Hanging System‘.

We ship Free of charge Australia wide, have a money back satisfaction guarantee and a best price policy.  Do let us know how we can assist. 🙂

Cheers,


Ed Banks – Shakespeare Solutions.

Posted on

Installing Muuto Dots in Plasterboard Walls

Muuto Dots Installed on Plasterboard no studs

‘Mutto Dots are a characteristic family of hooks that make a friendly addition to any wall’ is what is written on the box and I quite agree!

The problem with these friendly hooks is that they can be decidedly unfriendly if you are trying to install them into a hollow wall as inevitably your better half will not want them placed inline with the existing studs. This means you have to try and secure the large (14 gauge) self tapping screw which comes with the Muuto Dot directly into the board; a task which means installing extra timber in the wall, patching and repainting… until now…

The GeeFix Fixings are the ideal solution to this problem. The fixing itself is more than capable of handling the weight of your wifes handbag, your Child’s school bag or evening your child! (Although climbing on them is very much not recommended!) More importantly they are able to accept a wide range of threads including that which comes with the Muuto Dot.

We recommend the following installation method in plasterboard or hollow board walls:

1. Decide where the ‘Muuto Dots’ are to be installed and lightly mark with a pencil.
2. With a stud finder (or the tapping method) identify if any are on or near the studs. Any that are on the edge of a stud consider moving across.
3. Install any that are on the stud by drilling a hole and screwing the ‘Muuto Dot’ in.
4. Where a stud cannot be found, install a ‘GeeFix’ Fixing as per the instructions. (In addition to the fixing you will require a 25mm hole saw or spade bit)
5. With the GeeFix Fixing in place, simply screw the ‘Muuto Dot’ into place.
6. Stand back and enjoy your handy work, knowing the Dot has been well secured and will not require further attention in the future.

Can I use this method if I has already tried installing the ‘Muuto Dots’ without the ‘GeeFix’ Fixings?  Yes, absolutely! One of the great features of these fixings, is that you can remove any existing fixing by drilling around it with a hole saw and replacing with a ‘GeeFix

‘GeeFix’ Fixing can be purchased in packs of 4, 5 or 50 on the product page. Alternatively if you are interesting in retailing the ‘GeeFix’ Fixings please contact me directly.  Please do let me know if we can assist with this product or any of our Picture Hanging Systems.

That’s all for this week!

Cheers,

Ed Banks
Shakespeare Solutions.